Install owncloud with docker, ZFS and ansible

I’ve been happily running FreeNAS on my server for quite some time now, I am a fan of ZFS and I’ve used it to great advantage both at home and at work.

After its good service and with ZFS on Linux becoming stable, I have decided to move away from FreeNAS and install a plain Ubuntu 16.04 server image to play with docker and ansible and enjoy destroying and re-spawning my ephemeral service instances in seconds!

Continue reading “Install owncloud with docker, ZFS and ansible”

Quickly setup powerline for bash in ubuntu

Powerline can do many things and it is very configurable.

I wrote a small script in case you just want to power-up your bash prompt and do it without a lot of manual steps.

This is what you will get:

Get it done!

Read the README file first, then:

(you may need to install git first, or just copy and paste the script somewhere from the repo… it will anyway install git)

git clone git@github.com:vincepii/ubuntu-powerline-bash.git
cd ubuntu-powerline-bash
./install.sh

Feel free to improve the script.

Repository on GitHub: https://github.com/vincepii/ubuntu-powerline-bash

Remember The Lens – Revamped

I want to start this post by thanking Pavel Shabardin as he created some new tickets on the GitHub page of Remember The Lens that caused new nice features to be brought to the project.

What’s new

  • Icons. I was willing to replace those ugly icons I made a while ago since a long time. I found some really nice ones on openclipart.org that gave the lens a new fresh look.
  • Preview. It is now possible to right-click on a task to get extra information.
  • Complete/Uncomplete tasks. On the preview screen, a button will appear to complete/uncomplete a task (depending on its current status). Very handy.
  • Show completed tasks. Because of that button above, it’s also good to show already completed tasks, so a “Complete” can be easily undone. A new “Show/Hide” section on the lens filters has a button for this.
  • Internationalization. The lens is now open to translations. I lost the Russian translation because I introduced new messages and changed existing ones. The Italian translation is of course there :).

Under the lens

Screenshots are more immediate than a video showing the lens at work (also, last time I wasn’t able to speak loud enough). Here are some.

Setting up a personal git repository: end-to-end tutorial

Recently I was in France with a colleague at an event organized by ETSI. In that occasion we needed to work on some code, but for some reasons we couldn’t use the company remote repositories.

Manually merging changes to a local copy we had was a time consuming and inefficient task, so I quickly set up a git repository on my machine that my colleague could access through the local network. Having a reference to do that operation in a short time may be very useful in situations similar to that one, but version tracking may be essential as well when working on personal projects or sketching code for new ideas. Setting up a git server is also a good idea to recycle some old hardware (I used to have an old notebook which worked as a printing server and git repository on my home network).

The following tutorial summarizes the steps required to setup a SSH server, use RSA keys, authorize users, and create a new git repository. This reference is first of all useful for me, but I hope that someone else will take advantage of this yet-another-git-setup-tutorial :).

Disclaimer

There are many different ways of setting up a git repository. This tutorial shows a possible way for doing this quickly. Do not use this tutorial to set up a git repository in a production environment, where every configuration parameter (e.g.: for the SSH server) must be finely tuned and well understood.

Intended audience and assumptions

If you need to setup a git repository for personal use or for some reasons you don’t want to use a cloud service such as github, then this guide may help you. The steps here described will allow for the quick setup and use of a git repository on top of a fresh installation of an Ubuntu GNU/Linux distribution (I am using Ubuntu 12.10).

I assume that a git repository is created on the local machine inside the home folder of a new “git” user. In a more general configuration, where the git client and server are remote machines, you will just need to replace the loopback 127.0.0.1 address with the one of the server.

Some basic knowledge of the Unix command line interface is required.

SSH Server configuration

The machine that will host the git repository needs to be accessed by clients. A possible way to access a machine remotely is through SSH.
SSH supports both password and public/private keys authentication. In this tutorial I will use RSA keys.

Install and configure an SSH server on the machine that will host the git repository:

sudo apt-get install openssh-server

Edit the /etc/ssh/sshd_config file to tweak the SSH server settings at your preference. I generally disable Password Authentication (you may need to uncomment the line) and Challenge Response Authentication:

# Change to yes to enable challenge-response passwords (beware issues with
# some PAM modules and threads)
ChallengeResponseAuthentication no
# Change to no to disable tunnelled clear text passwords
PasswordAuthentication no

Start or restart the ssh daemon to accept the new configuration:

sudo /etc/init.d/ssh restart

Authorized Keys configuration

The public keys of the authorized entities who can login through ssh must be collected in the authorized_keys file under the ~/.ssh folder.

Create a git user on the machine that will host the repository (handle this as you prefer, it is not required to create a new user, but much cleaner):

sudo adduser git

Login as the git user, if you are on the same machine, just use

su git

to change to git user, then cd to the home directory

cd

Create a .ssh folder and set its permissions (see the ssh man (1) page for explanations on permissions of the .ssh folder and its content):

mkdir .ssh
chmod 700 .ssh

Create an authorized_keys file under the ~/.ssh folder and append to it the public keys of the authorized git users:

touch .ssh/authorized_keys

A possible way to populate the authorized_keys file, from a user on the same machine as the “git” user would be (appends the public key of the current user at the end of the authorized_keys file of the “git” user, command issued from the home directory):

sudo bash -c "cat .ssh/id_rsa.pub >> ../git/.ssh/authorized_keys"

Set the proper permissions for the authorized_keys file:

chmod 600 .ssh/authorized_keys

Create a new git repository

Install git (if needed):

sudo apt-get install git

Initialize an empty git repository (I assume repositories are created in the home folder of the git user):

mkdir test_repo.git
cd test_repo.git
git init --bare

The server configuration is done.

Setup RSA keys on the client

The remaining part of the tutorial refers to operations to be done on the client who wants to access the git repository that we have prepared. In order to use the Secure SHell connection, the client needs a pair of public/private keys.

If you already have RSA keys, put them in ~/.ssh, otherwise you can create a new pair with:

ssh-keygen -t rsa -C "Comment Here (usually your email)"

Move the pair of generated keys (id_rsa and id_rsa.pub) into ~/.ssh
See the FILES section of the SSH man (1) page to set the proper permission to the ~/.ssh folder and its content. In a typical configuration, you may want to use:

chmod 700 .ssh/
chmod 400 .ssh/id_rsa
chmod 400 .ssh/id_rsa.pub

Clone the git repository

Set the git user global configuration:

git config --global user.name "Your Name"
git config --global user.email you@example.com

Create a new folder where you want to clone the repository, cd into that folder and initialize git:

mkdir foo
cd foo
git init

Configure the git client to access the test_repo.git repository (add the pointer to a remote called origin):

git remote add origin ssh://git@127.0.0.1/~/test_repo.git

Clone the repository (if someone has already committed some changes):

git clone ssh://git@127.0.0.1/~/test_repo.git

Create a new file and upload to the repository:

echo "Hello" > readme.txt
git add readme.txt
git commit -m "First commit"

Push the committed changes to the master branch:

git push origin master

Done.

Ubuntu 12.10 and Hybrid Graphics on Sony VAIO S

Today I made a fresh install of Ubuntu 12.10.

After having read this thread on phoronix forums about the latest release of the proprietary AMD drivers, I decided (once more) to use the vgaswitcheroo solution.

The vgaswitcheroo module can be used to power off the discrete graphic card and use only the integrated one from Intel. Personally, I don’t have any advantage in using the discrete graphic as the integrated one is enough to play HD video, the most GPU consuming task I ever need.

So I confirm that the solution described in this post still works on 12.10.

I edited the two files, rebooted the notebook… and then there was silence!

Ubuntu 12.04 and Hybrid Graphics on Sony VAIO S

As an update to this post, I confirm that using vgaswitcheroo to shutdown the discrete AMD/ATI card on the new Sony Vaio S, works perfectly also in 12.04 (Precise Pangolin).

Quick reference:

  1. Edit the file /etc/modprobe.d/blacklist.conf (replace “gedit” with your favorite editor):
    sudo gedit /etc/modprobe.d/blacklist.conf
  2. Add the following lines at the end of the file:
    # radeon
    blacklist radeon
  3. Edit the file /etc/rc.local (replace “gedit” with your favorite editor):
    sudo gedit /etc/rc.local
  4. Add the following lines just before exit 0:
    modprobe radeon
    chown -R $USER:$USER /sys/kernel/debug
    echo OFF > /sys/kernel/debug/vgaswitcheroo/switch

After a restart, use this command to verify that the AMD/ATI discrete graphic card has been shutdown:

sudo less /sys/kernel/debug/vgaswitcheroo/switch

Your output should be similar to this:

0:IGD:+:Pwr:0000:00:02.0
1:DIS: :Off:0000:01:00.0

Where the + sign indicates that the Integrated card (Intel) is currently in use and the Off keyword in the 1:DIS: entry indicates that the discrete AMD/ATI card is powered off.

The benefits I’ve noticed when using this setup are:

  • The notebook is much less noisy
  • The battery lasts longer
  • The notebook is cooler

Creating screencasts with Ubuntu: a summary of available desktop recording applications

There are many available options to record your desktop on Ubuntu, but I’ve found only one of them to be properly working with my configuration.

My results could be hardware-dependent, so, this is my hardware:

  • Sony Vaio S-Series
  • i5-2520 @ 2.50 GHz processor
  • 4 GB RAM
  • Intel HD 3000 integrated graphic card (Hybrid Graphics with discrete ATI card is disabled)

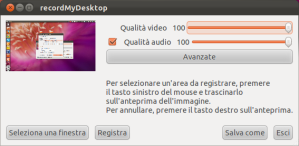
RecordMyDesktop

recordmydesktop

Project Home Page: recordmydesktop

This seems to be the most popular option when talking about screencasting software for Ubuntu.

It can easily record video + audio from your microphone and it is very easy to use it.

My problem is that the recorded video will not be synchronized with my actions, resulting in glitches, delay and low frame rate.

This is exactly what I am talking about:

However, many people are happy with this software (I’ve seen many HD videos properly recorded with recordmydesktop on YouTube), further, it is one of the simplest solution to test, just type:

sudo apt-get install gtk-recordmydesktop

or use the software center.

If it works with your configuration, good for you.

XVidCap

XVidCap

Project Home Page: xvidcap

This application works really well for video recording, however I wasn’t able to record audio from the microphone. Anyway, I have to admit that didn’t spend much time trying to fix the audio configuration.

The settings dialog is rich of options and the application is highly customizable.

Like recordmydesktop, you can find it in the repositories, so you can install it with

sudo apt-get install xvidcap

or through the software center.

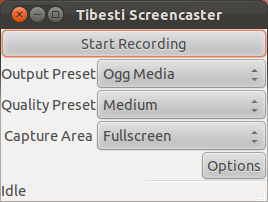
Tibesti

Tibesti

Project Home Page: tibesti

This application is not present by default in Ubuntu repositories, but you can find instructions on its home page on how to add the PPA to install it.

Alternatively you can download the last source archive, extract it and build the application with the setup.py script:

python setup.py build

The application is very simple to use but I had major issues when recording videos.

After a few seconds, the video stopped recording what was being displayed on the desktop and started collecting a big delay.

It must be remarked that recording audio from the microphone or from the system out is very easy, but the video problem prevented me from using this application.

FFMPEG

There are many tutorials on how to use ffmpeg for recording the desktop. It is also possible to easily record audio from the microphone.

One of the most useful resource I’ve come across is this page on Ubuntu Forums.

This is a very effective solution, but a GUI approach is preferred by most users for this kind of applications.

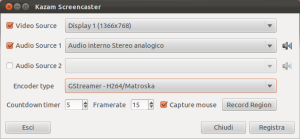
Kazam

Kazam

Project Home Page: kazam

This is the winner for tonight contest on desktop recording applications.

  • It records video flawlessly: no glitches, no frame losses, perfectly synchronized
  • When you stop the recording, your video is instantaneously available (with recordmydesktop you have to wait for a long encoding process)
  • It is very easy to record audio with video
  • The interface is modern and the look and feel is great, a special mention goes to the countdown window preceding the recording of a new screencast

Kazam is not present in Ubuntu repositories, but you can easily install it using the .deb archive that is provided on the launchpad page.

Conclusions

Kazam really had all the features of a modern desktop recording application for a modern OS. I was quite surprised for not having found it in the official repositories.

If I have omitted some other relevant desktop recording applications, just let me know about it.

Doing backups with Ubuntu: again with Back In Time

In the past, I’ve always used Back In Time to do my data backups, then I switched to DejaDup when it became the official Ubuntu backup tool in 10.10.

I’ve been quite happy with DejaDup: simple and neat interface (maybe even too simple), easy to use, solid.

The problems with DejaDup started when I wanted to search for a particular file across the backups. I was sure it was there, but I couldn’t remember in which backup (the date of the snapshot) I included it. DejaDup doesn’t provide a “snapshot browser” as Back In Time does and it is not possible to browse the data directly on the storage device as it is archived in tar format.  The only option is to recover a snapshot by its date.  In this situation, the lack of a more advanced set of functions made me fell helpless.

I don’t want to talk about the features of Back In Time here, as they are well documented on the web site along with some nice screenshots, but about why I preferred it over DejaDup. A single reason:

  • Backups are stored in plain format (files and folders) on your storage device, with the same directories structure of the source data

This implies a whole set of benefits:

  • Control: you can browse a snapshot with your favorite file browser or even with the very rational Back In Time interface. You have everything under your control (“Was that folder included in the backup?” Just go and check it!)
  • Portability: you can extract the data you need from the storage device even if the backup application is not installed. As long as the OS of the computer where you need to extract the data is able to read the file system of the backup driver, you can get every file you need

In conclusion, I installed Back In Time and re-started doing my incremental backups with this very nice tool.

If you want to give it a try (gnome and kde versions are available from Ubuntu repositories):

sudo apt-get install backintime-gnome

or

sudo apt-get install backintime-kde

Ubuntu 11.10 and Hybrid Graphics on Sony VAIO S

I bought this Sony VAIO S series notebook almost 8 months ago. As the majority of modern high-end notebooks, it is delivered with two graphic cards:

  • The integrated one, by Intel (i915)
  • The dedicated, or discrete one, by AMD/ATI (HD6470m in my configuration)

This system, called Hybrid Graphics, is intended to provide users with two different and ready-to-use configurations to regulate performance vs. power saving modes. VAIO notebooks have a STAMINA/SPEED hardware switch to decide which one of them to use.

It works pretty well on Windows 7, where you can use the STAMINA mode to activate the integrated card and increase battery duration or the SPEED mode to activate the AMD card and get the best performance out of this notebook.

Things are a bit different on Ubuntu. Ever since I own the notebook (Ubuntu 11.04 and 11.10), not only I’ve never been able to use the STAMINA/SPEED switch, but I’ve had a lot of problems when trying to use the AMD card in a “static” configuration (however, AMD is working on their proprietary Linux drivers and they are progressing a lot: http://www.phoronix.com/scan.php?page=news_item&px=MTAyNzk).

The good thing for me is that I don’t need to use the AMD card at all.

The Intel one works very well for pretty much everything, including HD videos and any kind of desktop effect. However, I’ve never tried games.

So, the solution for me has been simple: do not use the AMD card! There’s still something missing however: you cannot completely forget about the discrete graphic card, if its fan keeps spinning as loud as a vacuum cleaner or if it is producing so much heat below your wrist!

So, finally, here’s the solution I’ve always proficiently used to switch off the AMD card and use my notebook as it was provided without that (I’m assuming your system is clean as it is after a new installation):

  1. Edit your /etc/modprobe.d/blacklist.conf file and blacklist the radeon module (replace “gedit” with your favorite editor):
    sudo gedit /etc/modprobe.d/blacklist.conf

    Add the following lines at the end of the file:

    # radeon
    blacklist radeon
    
  2. Edit the /etc/rc.local file to use the vgaswitcheroo kernel module and switch off the discrete card
    sudo gedit /etc/rc.local

    Add the following lines just before exit 0

    modprobe radeon
    chown -R $USER:$USER /sys/kernel/debug
    echo OFF > /sys/kernel/debug/vgaswitcheroo/switch
    

And that’s all, from next restart you can forget about the AMD card.